How to Paint Special Effects/ Sponging Effects on Your Walls?
I would like to do some painting special effects like sponging etc around the house, what is the best way to go about it? (Martina Caldwell, Blackrock).
This is an area where you can really let your creativity run wild. Anything is possible such as breathing new life into an otherwise dead room, or even doing up old furniture to match this or that. With a little bit of practice and a few very simple tools, you too can design your own masterpiece, and be the envy of your friends while adding value and beauty to your home. With faux finishing techniques, you can do all this and more.
This decorating technique has been around for a long time. Faux finishes, as they are described can be applied using different techniques such as “sponging” for giving a deep textured rich look to walls, ceilings, or furniture; “ragging” where a crumpled rag is used for soft and delicate effects as a backdrop for furniture or artwork; “combing” for subtle contrasting lines; “marbling” for a distinctive appeal with a luxurious feeling; or “wood graining” to create the rich patterns and colours of fine wood without the high price- tag.
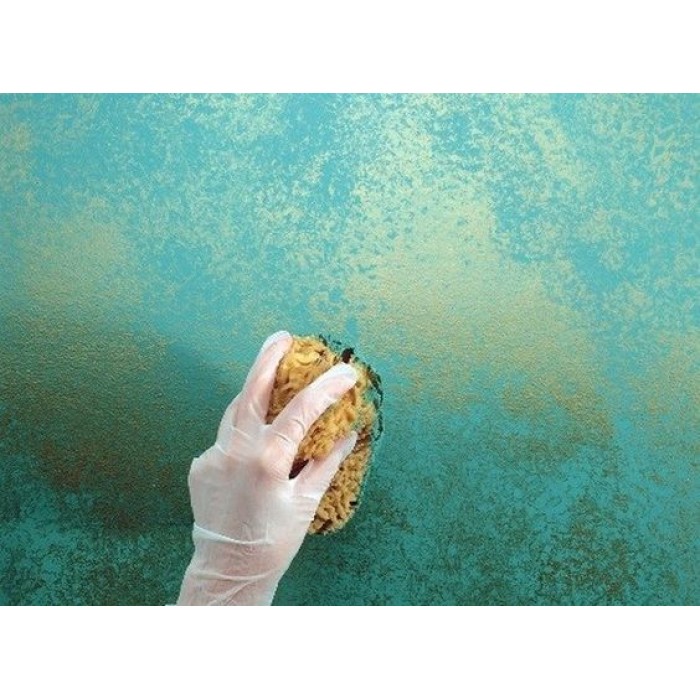
Sponging is perhaps the quickest and easiest way to go faux. It lets you create colourful walls from a dappled, mottled look to one of marble. Subtle or bold design variations are limited only by the number of colours, the contrast between different shades and the variety of application techniques used. Here is a quick run-down to get you started.
- Apply a base coat using any good
quality interior satin or semi-gloss oil-based or acrylic, water-based paint in
the colour of your choice. Most people go for the water acrylic-based version
nowadays.
- Once the base coat is dry you are ready to
sponge. Mix 3 parts of oil
- Based paint with one part Owatrol oil, or 3 parts of acrylic with 1 part Floetrol. Dampen a large sea sponge (synthetic sponges leave hard-edged identical impressions that don’t flow together very well) in water and squeeze out the excess. Lightly dip the sponge into the paint and blot off any excess on a paper towel.
- Now press the sponge lightly against the wall, repeating this in an overall pattern and texture, making sure the base coat is showing through.
- Rotate and twist the sponge (except when touching the wall) so you are not creating repetitive patterns or marks.
- Work the edges of the wall first. Balance the finish on the wall to match the edges. Stand back once in a while to judge the uniformity of the pattern or finish. (if your acrylic is drying too fast and you are losing the “wet edge”, add a little more Floetrol) You can make corrections by using the base coat colour and a new sponge. Whilst the pattern will be quite irregular, try to keep the amount of paint applied consistently for a uniform appearance. Finish one wall before starting the next.
Now, you can create a rustic and vintage look on your wall with our Crackle Effect Paint By SP Craquelee- Available now at our showroom. We delve into the limitless possibilities this crackle effect paint presents, providing you with inspiration and practical tips for your DIY home projects.


